Showing posts with label cake. Show all posts

Saturday, December 28, 2013

Strawberry Mousse Chocolate Cake

This is a revised recipe of my strawberry mousse cake. I first made this cake for my mum's birthday and have since made it again for a Christmas family gathering. 


Ingredients

A) 1x 20cm chocolate sponge cake, cut into 2 even layers


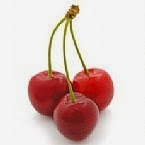
B) 300g strawberry, cleaned and hulled
     ¼ cup caster sugar
     1 tablespoon water
     1 teaspoon strawberry essence

C)  300ml cream
     3 tablespoons icing sugar
     ½ teaspoon pink food colouring (optional)

D) 1 tablespoon gelatine powder 
     50ml warm water 

E)  Extra strawberries sliced and cubed (I used approx 1/3cup)


F)  100ml thickened cream
     1 tablespoon icing sugar, extra

G)  Sugar syrup glaze (optional)

H)  6 even sized strawberries, halved for garnish 

Method

  1. Set aside 6 even sized strawberries for the garnish on top of the cake.
  2. Dice approx. 1/3 cup strawberries and set aside.
  3. Clean and hull the remaining strawberries. Add ¼ cup caster sugar and let it sit for 5 minutes. Purée them in a blender together with 1 tablespoon of water and 1 teaspoon strawberry essence then put it through a strainer. You should get about 400ml strawberry purée. Discard the strawberry seeds. Reserve 1½ tablespoons of the purée for the swirl effect on top of the cake.
  4. In a chilled bowl, whip 300ml cream with 3 tablespoons icing sugar till mousse state.
  5. Dissolve 1 tablespoon gelatine in 50ml warm water, whisk with a fork, let stand for 5 minutes. Whisk the gelatine again then strain it into the strawberry purée. Stir until combined
  6. Fold the whipped cream into the strawberry mixture. Add pink food colouring, if using. Pour into a measuring jug if your bowl doesn't having a pouring lip.
  7. Line the inner circumference of a 23cm spring form cake pan with plastic cake tape. Place a slice of the chocolate sponge cake at the base, cut side up and top it with approx. 1 cup of the mousse. Add in the strawberry pieces (leave a 2cm border around the cake). Press the fruits down gently if needed. Top it with some mousse just enough to cover the strawberry pieces.
  8. Top it with another layer of chocolate sponge cake and pour the rest of the mousse evenly over on it.
  9. Spoon teaspoonfuls of the reserved purée onto the surface of the mousse on desired positions and swirl it with a toothpick to create the swirls. I put a few teaspoons on the middle of the cake and the rest at clock position of 12, 2, 4, 6, 8 and 10.
  10. Cover the cake pan with cling wrap (twice). Refrigerate for at least 6 hours.
  11. Make the sugar syrup, then brush the reserved halved strawberries with sugar syrup. Set aside.
  12. Use an electric beater to beat 100ml thickened cream and 1 tablespoon icing sugar in a medium bowl until firm peaks form. 
  13. Place the cream in a piping bag fitted with a 1cm fluted nozzle and pipe rosettes around the edge of the cake. Arrange some glazed strawberries around the cake between the cream rosettes. 
  14. Cut the cake into wedges to serve. 
To make sugar syrup:

50ml (1/4 cup) water
1/2 tablespoon sugar
1/2 tablespoon unflavoured gelatine powder
  1. Pour water, sugar and gelatine powder into a small sauce pan.
  2. Stir the ingredients to combine over medium heat until the sugar and gelatine dissolves and the water begins to simmer.
  3. Remove the pan from heat and set aside for 5 minutes to cool slightly. Brush the glaze over fruit while slightly warm.
Notes & Tips

  • I lined the inner circumference of my spring form cake pan with plastic cake tape.
  • You can make your own plastic cake tape using clear acetate sheets bought from an arts & craft store. Start by measuring the height of the cake pan (approx 2.5 inches) and cut a long rectangular strip out of the acetate sheet (length of the strip is the circumference of the cake + 2 cm extra).
  • You could also decorate this cake with a patterned white chocolate collar if you wish
  • If you can't find acetate sheets, you can use baking paper instead
  • I placed my cake into a larger spring form cake pan- approx. 23cm. This way the mousse will cover the whole cake and you don’t need to cream the cake. If you don't have a larger spring form cake pan, you can trim your cake smaller.
  • If you notice that you have not completely covered the cake with the mousse, you could do a bit of patchwork by using up the left over cream for the rosettes- add  ¼ tsp pink food coloring to the cream and spread/fill in the spaces and smooth it out using a cake scraper. 
  • If you don't have strawberry essence, you could use strawberry flavoured gelatine powder instead
  • You'll need approx. 2 punnets of strawberries for this recipe.

Thursday, September 19, 2013

Lemon Yoghurt Cake

Recipe adapted from Australian Good Taste magazine, January 1997, page 12

Makes 12 slices

Ingredients

1 lemon
100g butter, room temperature
150g caster sugar
2 eggs, room temperature
1 cup yoghurt
175g self-raising flour, sifted
icing sugar, to dust

Method
  1. Preheat oven to 180°C. Grease a 20cm square cake pan with the melted butter or margarine.
  2. Finely grate the lemon rind, then juice the fruit. 
  3. Use electric beaters to beat butter and the sugar in a bowl until pale and creamy.
  4. Add eggs, one at a time, beating well after each addition. Add yoghurt, reserved rind and juice. Beat until combined.
  5. Gently fold in the sifted flour with a large metal spoon until combined. Spoon the mixture into the prepared cake pan and smooth the surface. Bake in pre-heated oven for 20-25 minutes or until a skewer inserted into the centre comes out dean. Remove from oven and place cake pan on a wire rack to cool.
  6. To serve, turn the cake onto a serving plate and remove the cake pan. 
  7. Dust with icing sugar when cake has cooled


Monday, June 3, 2013

Flourless Chocolate Cake


Ingredients

200g butter, chopped
180g dark chocolate, chopped

2 tablespoons cocoa powder, sifted
4 eggs, separated
1 cup caster sugar, sifted
2 cups almond meal
Icing sugar, for dusting
Whipped cream and strawberries/raspberries, to serve

Method
  1. Preheat oven to 180°C (160°C fan forced). Grease a 6cm deep, 20cm round (base) springform cake pan. Line base and side with baking paper.
  2. Place butter, chocolate and cocoa powder in a medium saucepan over low heat. Cook, stirring constantly for 2 to 3 minutes or until melted and combined. Remove from heat. Transfer to bowl to cool slightly.
  3. Using an electric mixer, beat egg whites until soft peaks form. Set aside. Using an electric mixer, beat egg yolks and sugar for 5 minutes or until thick. Set aside
  4. Add chocolate mixture and almond meal to egg yolk mixture. Stir to combine. Using a large metal spoon, gently fold half the egg whites into chocolate mixture. Repeat with remaining egg whites. Pour into prepared pan. Bake for 40 minutes or until a skewer inserted in centre comes out with moist crumbs clinging. Cool cake completely in pan. Dust with icing sugar. Serve with cream and strawberries/raspberries.

Monday, July 23, 2012

Chinese Steamed Sponge Cake Recipe

Recipe adapted from The Australian Women's Weekly Oriental Dinner Party Cookbook, page 15

Ingredients

2 eggs, room temperature (70g each)
½ cup caster sugar
1/3 cup evaporated milk
60g unsalted butter, melted, cooled
¾ cup self-raising flour
½ teaspoon bicarbonate of soda

Method
  1. Sift the flour and bicarb of soda into a small bowl.
  2. In another bowl, whip the eggs and sugar with an electric mixer for 5 minutes or until thick.
  3. Stir in milk and butter; whisk in the sifted flour and soda until incorporated.
  4. Line an 18cm bamboo steamer with a sheet of grease proof paper, pour mixture into steamer.
  5. Cover, place steamer over wok or pan of boiling water, cook over high heat 15 minutes or until a skewer inserted into the centre comes out clean.  
  6. Turn cake onto wire rack. Serve warm.
Notes & Tips

This cake is best served piping hot from the steamer. If a bamboo steamer is not available, an aluminium steamer can be used instead.

Monday, June 11, 2012

Banana Cake


Ingredients

Melted butter, to grease
125g butter, at room temperature
315g (1 cup) caster sugar
1¼ cups mashed overripe banana (about 2 large bananas)
2 eggs
1 teaspoon vanilla extract/essence
100ml buttermilk
225g (1½ cups) self-raising flour
½ teaspoon bicarbonate of soda
1 banana, extra, to decorate 
¼ teaspoon ground cinnamon powder, to decorate
Fresh lemon juice, to brush

Ingredients – Cream cheese frosting

250g cream cheese, at room temperature
½ cup icing sugar
½ teaspoon vanilla essence

Method
  1. Preheat oven to 180°C. Brush a round 20cm (base measurement) cake pan with melted butter to grease. Line the base and side of the pan with non-stick baking paper.
  2. Place the butter, sugar, banana, eggs and vanilla in the bowl of a food processor, and process for 2 minutes or until well combined. Add the buttermilk and process until combined.
  3. Add the flour and bicarbonate of soda, and process until just combined. Pour the mixture into the prepared pan. Shake the pan to settle the mixture. Bake in oven for 1 hour or until a skewer inserted into the centre comes out clean. Set aside in the pan for 10 minutes to cool slightly, before transferring the cake to a wire rack to cool completely.
  4. Meanwhile, to make the cream cheese frosting, place the cream cheese, icing sugar and vanilla essence in a bowl. Use an electric mixer to beat until mixture is light and fluffy.
  5. Place the cake on a serving plate. Spread the cream cheese frosting over the top of the cake.
  6. Lightly dust the cake with sifted ground cinnamon powder.
  7. Peel and thinly slice the extra banana. Lightly brush 1 side of each slice of banana with lemon juice. Arrange the banana slices, lemon juice side up, around the edge of the frosting to serve.
Notes & Tips

Buttermilk substitute: Place a tablespoon of white vinegar or lemon juice into 1 cup regular milk. Let stand for five to ten minutes. Then, use as much as your recipe calls for.

Saturday, April 21, 2012

Citrus Semolina Syrup Cake

 Recipe from Super Food Ideas magazine, November 2003 issue, page 50


Ingredients


2 oranges 

3 lemons

250g unsalted butter, softened

2¼ cups caster sugar
1 teaspoon vanilla essence
5 eggs
2 cups semolina
2 teaspoons baking powder
200g ground almonds
¼ cup orange juice or Grand Marnier (see note)


Method
  1. Preheat oven to 170°C. Grease a 2 litre-capacity, 26cm (top) gugelhopf (ring) pan.
  2. Finely grate rind of 1 orange and 2 lemons. Using an electric mixer, beat butter, 1¼ cups of sugar, rinds and vanilla together until light and creamy. Add eggs, 1 at a time, mixing well after each addition. Add semolina, baking powder and almonds. Mix gently to combine.
  3. Spoon mixture into prepared pan. Bake for 1 hour or until a skewer inserted into the centre comes out clean.
  4. Shred rind from remaining orange and lemon. Juice fruit. Combine juice, remaining sugar and Grand Marnier or orange juice in a saucepan over low heat. Cook, stirring, until syrup comes to the boil. Reduce heat. Simmer for 10 minutes or until reduced by half.
  5. Using a skewer, pierce holes in surface of warm cake. Pour three-quarters of syrup over cake. Add shredded rind to remaining syrup. Stand cake in pan for 15 minutes before turning onto a plate. Spoon over remaining syrup, serve the cake in slices with a dollop of crème fraiche.
Notes & Tips

Semolina is coarsely ground durum wheat. You'll find it in the health food section of your supermarket.

Grand Marnier is an orange-flavoured liqueur. Substitute with orange juice for a non alcoholic version


Tuesday, October 4, 2011

Black Forest Cake

Since my mum, dad and hubby have birthdays all around the same time, I decided to make one birthday cake to celebrate all their birthdays this year instead of making them an individual cake each.

This recipe is my new and improved Black Forest Cake. This recipe will give you a very rich and decadent cake. To start with, there are 5 layers of chocolate sponge cake, 2 layers of chocolate mousse with cherries and 2 layers of cream. It was very labour intensive to put together and decorate this cake but the time spent was well worth it and my family all enjoyed eating this cake :)


Serves 8

Ingredients

Chocolate Sponge Cake


4 room temperature eggs, separated
½ cup caster sugar
1 teaspoon bicarbonate soda
½ cup cornflour
1 tablespoon plain cake flour
3 tablespoons cocoa powder

Chocolate Mousse

2 egg yolks
75g caster sugar
50ml whole milk
75g top quality dark chocolate
Pinch of table salt
100ml whipping cream


Cherries

1x 670g jar morello cherries
2 tbs caster sugar
1 tbs cornflour

Kirsch Syrup

60ml (¼ cup) Kirsch
2 tbs boiling water
2 tbs caster sugar, extra

Cream

600ml cream
6 tbsp icing sugar

To Build Your Black Forest Cake


All of the above - ie. x 5 layers chocolate sponge cake, the chocolate mousse, cherries, Kirsch syrup, freshly whipped cream plus:
Shards of grated dark chocolate (this is your ‘forest’)
Chocolate sprinkles
Fresh or glazed cherries (optional)


Method

Chocolate sponge cake:
  1. Preheat oven to 180°C.
  2. Grease and line 2 x 20cm springform tins
  3. Place egg whites in a large bowl and using an electric mixer beat the eggs on high speed until soft peaks form.
  4. Sift together caster sugar and bicarbonate of soda into a separate bowl.
  5. With the mixer still going, gradually add the caster sugar mixture one tablespoon at a time into the egg whites, beating until dissolved after each addition. When all the sugar is dissolved, turn off mixer.
  6. Add egg yolks and beat again until combined.
  7. In a separate bowl, sift dry ingredients three times to aerate and combine. Sift onto the egg mixture. Use a spatula to gently fold flours into eggs. This is the critical bit, use a ‘light’ hand and don’t over mix.
  8. Pour the mixture between prepared springform tins and bake for 20 minutes. The sponge is cooked when it has slightly come away from the sides and the top springs back when lightly touched.
  9. Allow cakes to cool in pan for 5 minutes before turning onto wire racks to cool completely.
  10. Use a large serrated knife to cut the cake horizontally into 2 even layers.
  11. Repeat above steps again but using only half of the ingredients to make your fifth layer (you will have 1 spare slice of cake)
Chocolate Mousse:
  1. Beat the egg yolks with the sugar for 5 minutes, or until stiff.
  2. Gently warm the milk in a small pan. Remove it from the heat and stir in the beaten egg yolks. Return to a medium heat and cook for a further 2-3 minutes, stirring frequently then remove from the heat.
  3. Finely chop the chocolate and place it in a medium sized bowl. Pour the warm milk and the eggs over the chocolate and stir until the chocolate has melted. Add the salt and leave to cool.
  4. Whip the cream until soft peaks form. Fold the cream into the cooled chocolate mixture.
Cherries:
  1. Drain the cherries, reserving 2/3 cup of the juice. Reserve 12- 16 cherries to decorate.
  2. Place the remaining cherries and the reserved juice in a saucepan with the sugar and cornflour.
  3. Stir over medium-low heat until the mixture boils and thickens.
  4. Transfer to a large bowl. Cover with plastic wrap and place in the fridge to chill.
Kirsch syrup:

Place kirsch, water and extra sugar in a jug and stir until the sugar dissolves.


Freshly whipped cream

Use an electric beater to beat cream and icing sugar in a medium bowl until firm peaks form.

To Build Your Black Forest Cake
  1. Start with a layer of chocolate sponge cake
  2. Splash cake with Kirsch syrup
  3. Spread a thin layer of mousse onto the sponge cake
  4. Add half the cherry mix
  5. Place a layer of chocolate sponge cake on top of the cherries
  6. Pipe a layer of cream
  7. Add another layer of chocolate sponge cake
  8. Spread another layer of the mousse and then add the remaining cherries
  9. Another layer of chocolate cake
  10. Another splash of Kirsch syrup
  11. Then another layer of piped cream
  12. Final layer of chocolate sponge cake
  13. Spread the remaining cream over the top and side of the cake.
  14. Place the remaining cream in a piping bag fitted with a 1cm fluted nozzle and pipe rosettes around the edge of the cake top and around the edge of the cake base.
  15. Sprinkle the chocolate shards over the middle section on the top of the cake and the chocolate sprinkles onto the side of the cake.
  16. Arrange reserved cherries on top of each second cream rosette.
  17. Let cake set for 3-6 hours.
  18. Cut the cake into wedges to serve.

Tuesday, October 5, 2010

Chocolate Sponge Cake

Ingredients

4 room temperature eggs, separated

½ cup caster sugar
1 teaspoon bicarbonate soda
½ cup cornflour
1 tablespoon plain cake flour
3 tablespoons cocoa powder

Method
  1. Preheat oven to 180°C.
  2. Grease and line a 20cm springform tin.
  3. Place egg whites in a large bowl and using an electric mixer beat the eggs on high speed until soft peaks form.
  4. Sift together caster sugar and bicarbonate of soda into a separate bowl.
  5. With the mixer still going, gradually add the caster sugar mixture one tablespoon at a time into the egg whites, beating until dissolved after each addition. When all the sugar is dissolved, turn off mixer.
  6. Add egg yolks and beat again until combined.
  7. In a separate bowl, sift dry ingredients three times to aerate and combine. Sift onto the egg mixture. Use a spatula to gently fold flours into eggs. This is the critical bit, use a ‘light’ hand and don’t over mix.
  8. Pour the mixture into the prepared springform tin and bake for 20 minutes. The sponge is cooked when it has slightly come away from the sides and the top springs back when lightly touched.
  9. Allow cake to cool in pan for 5 minutes before turning onto wire rack lined with baking paper to cool completely.
  10. Use a large serrated knife to cut the cake horizontally into 2 even layers (insert toothpicks at intervals to use as a guide as you cut)
Notes & Tips for making sponge cake

The eggs should be at room temperature. 

Use really fresh eggs

Eggs and caster sugar must be whisked for a full 10 minutes with an electric whisk, until pale and thick. It’s thick enough when it’s about three times the volume. When you lift out the whisk, the thick mixture that drips off should leave a trail on top of the rest.

It’s crucial to fold in the flour with a sure but light touch – you don’t want to undo all that good whisking by knocking out the air!


To make the batter rise as much as possible, the bottom of the pan should have more heat than the top. So bake the cake on the bottom instead of middle shelf.

White Chocolate Strawberry Mousse Cake

I made this White Chocolate Strawberry Mousse Cake for my mum's birthday recently :) 


You’ll need approx 4 punnets strawberries for this recipe

Ingredients
1 x Chiffon cake base, cut into 2 even layers
Click here for the Chiffon Cake Base recipe

A) 400g strawberry
1 tbsp lemon juice
50g caster sugar
1 tsp strawberry essence
Extra strawberry sliced and cubed (as much as you like- I used approx 100g)
Whole strawberry for garnish (optional)

B) 300ml thickened cream
3 tbsp icing sugar

C) 100g white chocolate
50ml thickened cream

D) 15g gelatine (approx. 1 tbsp)
50ml hot water

E) 100ml thickened cream
1 tbsp icing sugar, extra

Method
  1. Clean and hull the strawberries. Add in 50g sugar and let it sit for awhile. Puree them in a blender and put it through the strainer. You should get about 400ml strawberry puree. Stir in 1 tbsp of lemon juice. Reserve 2 tbsp of this puree for the swirl effect.
  2. Whip 300ml thickened cream with 3 tbsp icing sugar till mousse state.
  3. Melt 100g white chocolate then add into 50ml thickened cream.
  4. Dissolve gelatine in hot water, let stand for 5 minutes then stir this into the strawberry puree. 
  5. Add melted white chocolate mixture into the strawberry puree.
  6. Fold the whipped cream into the strawberry chocolate mixture.
  7. Line the cake pan with a slice of the cake base; top it with half the mousse. Add in the strawberry pieces. Press the fruits down gently if needed. Top it with some mousse just enough to cover the strawberry pieces.
  8. Top it with another layer of cake and pour the rest of the mousse on it.
  9. Spoon teaspoonfuls of the reserved puree onto the surface of the mousse on desired positions and swirl it with a toothpick to create the swirls.
  10. Refrigerate for at least 3 - 4 hours.   
  11. Use an electric beater to beat cream and icing sugar in a medium bowl until firm peaks form. 
  12. Place the cream in a piping bag fitted with a 1cm fluted nozzle and pipe rosettes around the edge of the cake. Arrange some strawberries around the cake between the cream rosettes. Cut the cake into wedges to serve. 
Notes & Tips
To create the swirl effect on top of the cake, drop one teaspoon of strawberry puree on the cake surface and swirl the puree with a toothpick. I put 1 teaspoon on the middle of the cake and the rest at clock position of 12, 2, 4, 6, 8 and 10.

*** I lined the inner circumference of my spring form cake pan with plastic cake tape and trimmed my cake to be smaller than the spring form pan. This way the mousse will cover the whole cake and you don’t need to cream the cake but just pipe some rosettes or whatever with some cream and do the rest of the décor on the cake. If you don't have any cake tape, use clear cellophane instead. Moisten one side of the cellophane with some water to help it adhere to the sides of the pan.

Friday, June 25, 2010

Carrot Cake

I felt like doing some baking today, so I made this carrot cake which is just so moist and full of taste. WARNING though- It's not for the diet conscience.

I would normally add ½ cup walnuts to my carrot cake but today I just simply forgot! So I added some to the top of the cake as decoration instead :P

The mini carrots around the cake are made out of marzipan. Marzipan is a sweet almond and sugar paste. It can be moulded into any shape and is commonly sculpted and painted into fruit, animals, and flowers. When used to ice a cake, marzipan can be rolled into thin sheets and draped over the cake. It is then carefully smoothed down to provide a uniform look- wedding cakes are commonly iced this way.

You can easily make your own marzipan or purchase it in the baking section of your supermarket. I didn't have any in my pantry and just made it from scratch. I used ½ cup almond meal, ½ cup icing sugar, ½ eggwhite and 1 drop vanilla extract. I then kneaded all the ingredients together until I had a smooth pliable dough. The marzipan carrots are easy enough to make, and they just simply look adorable on top of carrot cake or cupcakes!

Adapted from the recipe in Fresh Living magazine- 9 August 2004, page 53

This recipe makes one 20cm round cake or sixteen 1/3 cup capacity cupcakes

Ingredients

Oil, to grease
2-3 (about 300g) carrots
1 cup self-raising flour
½ cup plain flour
1 tsp bicarbonate of soda
½ tsp ground cinnamon
½ cup brown sugar
¾ cup vegetable oil
½ cup golden syrup
3 eggs
1 tsp vanilla essence
½ cup walnuts, chopped

Icing

250g spreadable cream cheese (softened)
½ cup icing sugar
½ tsp vanilla essence

Marzipan carrots

Marzipan
Red and yellow food colouring
Icing sugar for dusting
Edible sprigs of herbs for decoration, such as dill or parsley (optional)


Method
  1. Preheat oven to 170°C. Grease a 20cm (base) round cake pan lightly with oil, and line with non-stick baking paper. Peel and grate the carrots, and set aside. Sift the flours, bicarbonate of soda and cinnamon into a large bowl. Mix well together.
  2. Put the brown sugar, oil, golden syrup, eggs and vanilla in a separate bowl. Use a balloon whisk to mix until combined.  
  3. Pour the oil mixture into the dry ingredients. Use a wooden spoon to stir gently until just combined. Stir in the grated carrot and walnuts. 
  4. Pour the mixture into the pan and bake for 1 hour. Set aside for 5 minutes, before turning out onto a wire rack to cool completely.  
  5. To make the icing, place the cream cheese, icing sugar and vanilla essence in a bowl. Use an electric mixer to beat until mixture is light and fluffy.
  6. Spread the icing over the cake. Decorate cake as desires
To make the marzipan carrots

Coat your hands with icing sugar, or wear plastic gloves (this prevents the marzipan from sticking to your hands).

Knead the marzipan until it has softened slightly. Flatten the marzipan into a disc, and add a few drops of red and yellow food coloring to the middle, using a ratio of 1 drop red to 2 drops yellow. Fold the marzipan into a ball and begin to knead the color throughout the dough, adding more food coloring if desired, working until the marzipan is one uniform color.

Roll the dough into small balls the size of a 5 cent piece. Roll the balls between your palms, elongating them into thin tubes and tapering one end, so that they are shaped like carrots.

Take a toothpick and, holding it perpendicular to the carrots, make horizontal indentations all along the length of the carrot to create slight creases.

If desired, poke holes in the tops of the carrots, and insert the sprigs of herbs to be the carrot leaves.

Store marzipan carrots in an airtight Tupperware container for up to two weeks

Tuesday, January 12, 2010

Green Tea Tiramisu

This blog post is actually written in retrospect since I had forgotten to take a photo of this cake. Thankfully my brother-in-law had taken a photo and sent me a copy so that I could post it on my blog :)

I made this dessert for a Xmas dinner party with my parents and hubby's family. I was originally going to make Tiramisu for dessert since my mother-in-law is a fan of it and I thought it'd be a good way to earn some extra brownie points, hahaha :P

I changed my mind however since I tend to make my tiramisu with a very strong coffee and mascarpone cheese flavour, and my mother-in-law enjoys a more softer Asian version of tiramisu that can be found in Asian bakeries such as Bread Top. So as I was flicking through some Asian cookbooks for some inspiration, I came across a recipe for Green Tea Tiramisu. Intrigued by the idea of replacing coffee with green tea, I did a trial prior to the Xmas party and thoroughly enjoyed it! So, here's my version of this Italian dessert with an Asian twist! It's a "Tea-ramisu" :)

Note: I prefer a much stronger green tea flavour, but if you prefer a more subtle flavour, then use less green tea powder in the following recipe. Also use room temperature eggs for this recipe

Ingredients

2 cups brewed green tea, cooled
1 packet of 250g lady fingers biscuits/ sponge fingers

Green Tea Mascarpone Mixture

3 egg yolks
3 egg whites
½ cup sugar, sifted
250g mascarpone cheese, softened
1 cup cream
1 teaspoon orange flavoured liquer (e.g Cointreau)
3 ½ tsp green tea powder

Method
  1. Beat egg whites in a medium bowl with electric beaters until stiff peaks form. 
  2. Beat egg yolks and sugar in a large bowl with electric beaters until pale and thick.
  3. In another bowl, beat the mascapone cheese until smooth and creamy. Add the green tea powder 1 tsp at a time, adjusting according to your taste. Mix together well.
  4. Fold the mascarpone into the egg yolk mixture.
  5. In a separate bowl, whip the cream to soft peaks. Add orange flavoured liquer, if using.
  6. Fold the mascarpone mixture into the whipped cream until well blended. Then add egg whites and fold gently until blended.
  7. Dip each ladyfinger/spongefinger into the brewed tea (don't let them sit in the tea too long or you'll get super soggy ladyfingers, just a second or two, until they get a little soft).
  8. Layer them on the bottom of a rectangular glass dish or 20cm springform cake pan.
  9. Spread 1/3 of the mascarpone cream mixture on top, and repeat layers until finished (I had 3 ladyfinger layers and 3 mascarpone layers). The top layer should be the mascarpone cream layer.
  10. Refrigerate for at least a couple of hours or preferably overnight to let it set well. Overnight is best as this also allows all the flavours to be absorbed.
  11. Decorate cake as desired when it is set. You can dust some green tea powder before serving or garnish the tiramisu with strawberries and chocolate triangles as I have done.
To make the striped chocolate collar:

You'll need:

75g-100g dark chocolate melts
60g white chocolate melts
cake decorating comb or fork
cake tape or baking paper

Measure the height of the cake (approx 2.5 inches) and cut a long rectangular strip out of baking paper (length of the strip is the circumferance of the cake + 2 cm extra).

Lay the baking paper strip on a flat surface and spread a thin and even layer of melted dark chocolate over the entire sufrace using a spatula. Drag a cake decorating comb or a fork through the chocolate. Set at room temperature.

Melt the white chocolate and spread over the dark chocolate. Spread firmly to fill all the gaps. Leave until just set- you want the chocolate strip to be firm yet malleable. If the chocolate cracks when bent, it is set too hard.

Wrap the paper around cake, chocolate side in (this is the REALLY messy bit!). Hold paper strip in place for a couple of minutes until the strip holds itself onto the cake. Seal the ends.

Put the cake into the fridge until the chocolate collar is set, approx. 30 minutes.

When set, carefully peel away the paper (it should come away very easily). Refrigerate the cake until ready to be served.

Notes & Tips

A cake decorating 'comb' is a flat plastic tool with teeth on each end. Combs are available from specialty kitchen or cake decorating shops.

Monday, October 5, 2009

Chinese Chestnut Sponge Cake

I made this chestnut sponge cake as a birthday cake for my mum since she really likes chestnuts. 
I wasn't able to source fresh chestnuts for this recipe so I used frozen instead- it was more convenient anyways since the chestnuts had been peeled already. The roasted chestnuts that I'm referring to in the recipe are the ready to eat ones that are packaged and usually found in Asian food shops. They add some sweetness to the chestnut filling but if you don't have any, just use 450g frozen chestnuts and add a bit more sugar when making the filling. Have a good long weekend!


Ingredients

1x Chiffon cake base, cut into 2 even layers
Click here for the Chiffon Cake Base recipe

Filling

400g frozen chestnuts, peeled
50g roasted peeled chestnuts
½ cup caster sugar
½ cup water (preferably water used in cooking chestnuts)
½ tsp vanilla essence
1½ tbsp butter, melted
2 tbsp milk

Decorating

3 tbsp icing sugar
300ml thickend cream
200g strawberries, thinly sliced
10 roasted peeled chestnuts

Method

  1. Place frozen chestnuts in a saucepan and add enough water to cover them. Cook until soft. Drain, reserving the water.
  2. In a bowl, combine sugar with chestnut water or plain water and stir until dissolved.
  3. Place chestnuts, sugar water, melted butter, vanilla essence and milk into a bowl of a food processor and mix until a smooth paste consistency forms.
  4. Whip thickened cream in a clean mixing bowl. Add in icing sugar, 1 tablespoon at a time until stiff peaks form.
  5. Spread a thin layer of whipped cream on one half of the cake layer.
  6. Spread a layer of chestnut filling onto cake layer with whipped cream. Place the other half of cake over the chestnut filling, then top again with some more whipped cream.
  7. Cover entire cake with whipped cream, then pile remaining chestnut filling on top of cake. (I forced the chestnut filling through a spoon with round slits to create the pile of strands seen in the photo. You can also use a potato masher too for the same effect).
  8. Place the remaining cream in a piping bag fitted with a 1cm fluted nozzle and pipe rosettes around the edge of cake.
  9. Arrange chestnuts around the cake, either in between the cream rosettes or on top of each second cream rosette. 
  10. Place sliced strawberries around the bottom edge of cake, with the pointy end facing up.
  11. Cut the cake into wedges to serve.

Sunday, September 20, 2009

Chiffon Cake Base

A chiffon cake is a very light, sponge type of cake. It is typically served accompanied with flavourful sauces or other accompaniments, such as chocolate or fruit fillings.

Click here for my Mango Mousse cake recipe.
Click here for my Chinese Chestnut Sponge recipe.
Click here for my White Chocolate Strawberry Mousse cake recipe.


Ingredients


4 eggs (at room temperature), separated
1/4 tsp salt
50g caster sugar, sifted
1/4 tsp vanilla essence
75ml warm corn oil
110ml warm water
150g plain flour
¾ tsp baking powder
1/2 tsp cream of tartar, sifted
75g caster sugar, extra, sifted

Method

  1. Preheat oven to 175°C. Grease and line a 20cm spring form cake pan.
  2. Whip egg whites in a clean mixing bowl until big bubbles are formed. Add in the cream of tartar and whip until white in colour. Add in sugar, 1 tablespoon at a time and whip until egg whites are stiff.
  3. Place egg yolks, salt, caster sugar & vanilla essence in a large mixing bowl and mix well with an electric hand mixer.
  4. Pour warmed oil into yolk mixture.
  5. Stir warm water into yolk mixture.
  6. Sieve plain flour and baking powder together and fold it gently into yolk mixture using a large metal spoon.
  7. Pour 1/2 egg white mixture into yolk mixture and fold until combined.
  8. Fold remaining yolk mixture into the remaining egg white mixture.
  9. Pour batter into prepared cake pan and bake for 45 minutes or until a skewer inserted into the centre of the cake comes out clean.
  10. Invert cake onto a wire rack and leave to cool. Then cut cooled cake into 2 layers.
Notes & Tips

Don't open the oven door while your cake is baking, otherwise it can flop in the centre. When your cake is cooked, it will come away from the sides of the pan, and spring back when touched lightly in the centre.

Substitute corn oil with vegetable oil if none available

    Mango Mousse Cake


    I made this mango mousse cake as a surprise for my dad's birthday.
    You'll need around 5 ripe medium sized mangoes for this recipe.
    Click here for my chiffon cake base recipe.

    Ingredients

    1x Chiffon cake base, cut into 2 even layers
    300ml Thickened cream
    3 tbsp icing sugar, sifted
    300g Mango, pureed (remove 2 tbsp for swirl effect)
    200g Mango, cut into 2cm cubes
    15g gelatine powder
    100ml thickened cream, extra
    1 tbs icing sugar, extra


    Method
    1. Dissolve gelatine in 50ml hot water. Keep warm for use later.
    2. Add icing sugar to cream, then whip until stiff.
    3. Add gelatine solution into mango puree and mix well.
    4. Add mango gelatine mixture into whipped cream and combine well.
    5. Line the inner circumferance of a spring form cake pan with plastic cake tape (or clear cellophane cut to size if none available).
    6. Put 1 layer of cake onto cake pan and top it with mango mousse filling. Add in the mango cubes and top it with some mousse just enough to cover the mango cubes.
    7. Put on the other cake layer and pour all the mousse over it.
    8. To create the swirl effect on top of cake, drop one teaspoon of mango puree on the cake surface and swirl the puree with a toothpick. I put 1 teaspoon on the middle of the cake and the rest at clock position of 12, 2, 4, 6, 8 and 10.
    9. Whip the extra cream and extra icing sugar in a clean mixing bowl, then pipe some rosettes around the cake to decorate.
    10. Chill cake for at least 4 hours (best overnight) before serving.

    Notes & Tips

    You can omit the swirl effect and just decorate the cake with sliced mangoes

    Trim the chiffon cake to be smaller than the springform pan. This way the mousse will cover the whole cake when you pour it into the cake tin and you don't need to cream the cake.
    -->
    Blog Widget by LinkWithin